Photo editing workflow using Darktable
Before switching to Linux, I used to have an Adobe Photoshop photo workflow. I never used Lightroom, so when I switched over, I had to redesign my workflow from the ground up. After trying out a few photo editors, I ended up settling on Darktable. It’s available for free for Windows, Mac, Linux and BSD.
I won’t cover tagging, geotagging nor any other photo organization techniques, nor will I go into the various other functions Darktable has, for example, tethered shooting, print previews, among others.
Importing and directory structure
The directory structure I use for Darktable is very simple. I have one root
Darktable folder and underneath I use one Darktable/Imports folder for all
camera imports, a Darktable/Exports folder for exports and additionally I have
Darktable/Samples for lens or camera samples that I might sometimes download
to play around with. That way, I can keep them separate from my own
work.
Opening Darktable, we’re greeted by an empty view where your images will appear once you import them, or where your images are if you’re already a user. In the top bar, click on the settings icon (the gear), and click on “Session options”. Here, you can set the import folder, import folder naming and picture naming. Mine looks like this:
base directory naming pattern: $(PICTURES_FOLDER)/Darktable/Imports/
sub directory naming pattern: $(YEAR)$(MONTH)$(DAY)_$(JOBCODE)
file naming pattern: $(YEAR)$(MONTH)$(DAY)_$(SEQUENCE).$(FILE_EXTENSION)
For more options, check out the documentation. The format is highly customizable.
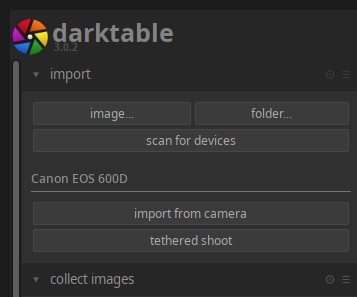
Darktable import options
In order to import images, I usually connect the camera directly to the
computer. Darktable should recognize most cameras. If it does not appear
immediately, hit “Scan for devices” and it should appear below. From there, I
assign a jobcode and, if useful, I override today’s date and I set it to the
date of the shoot. For multi-day shoots, I tend to use the day the shoot
started. If you’re importing from an SD card, you must create the folder
yourself under the Imports directory and then import the folder into
Darktable. Once imported, you can select the new job from the “Collect images”
module on the left hand panel, either by going to “folders” and selecting the
new job or by going to “film roll” and selecting the newly imported images. You
should see something like this now.
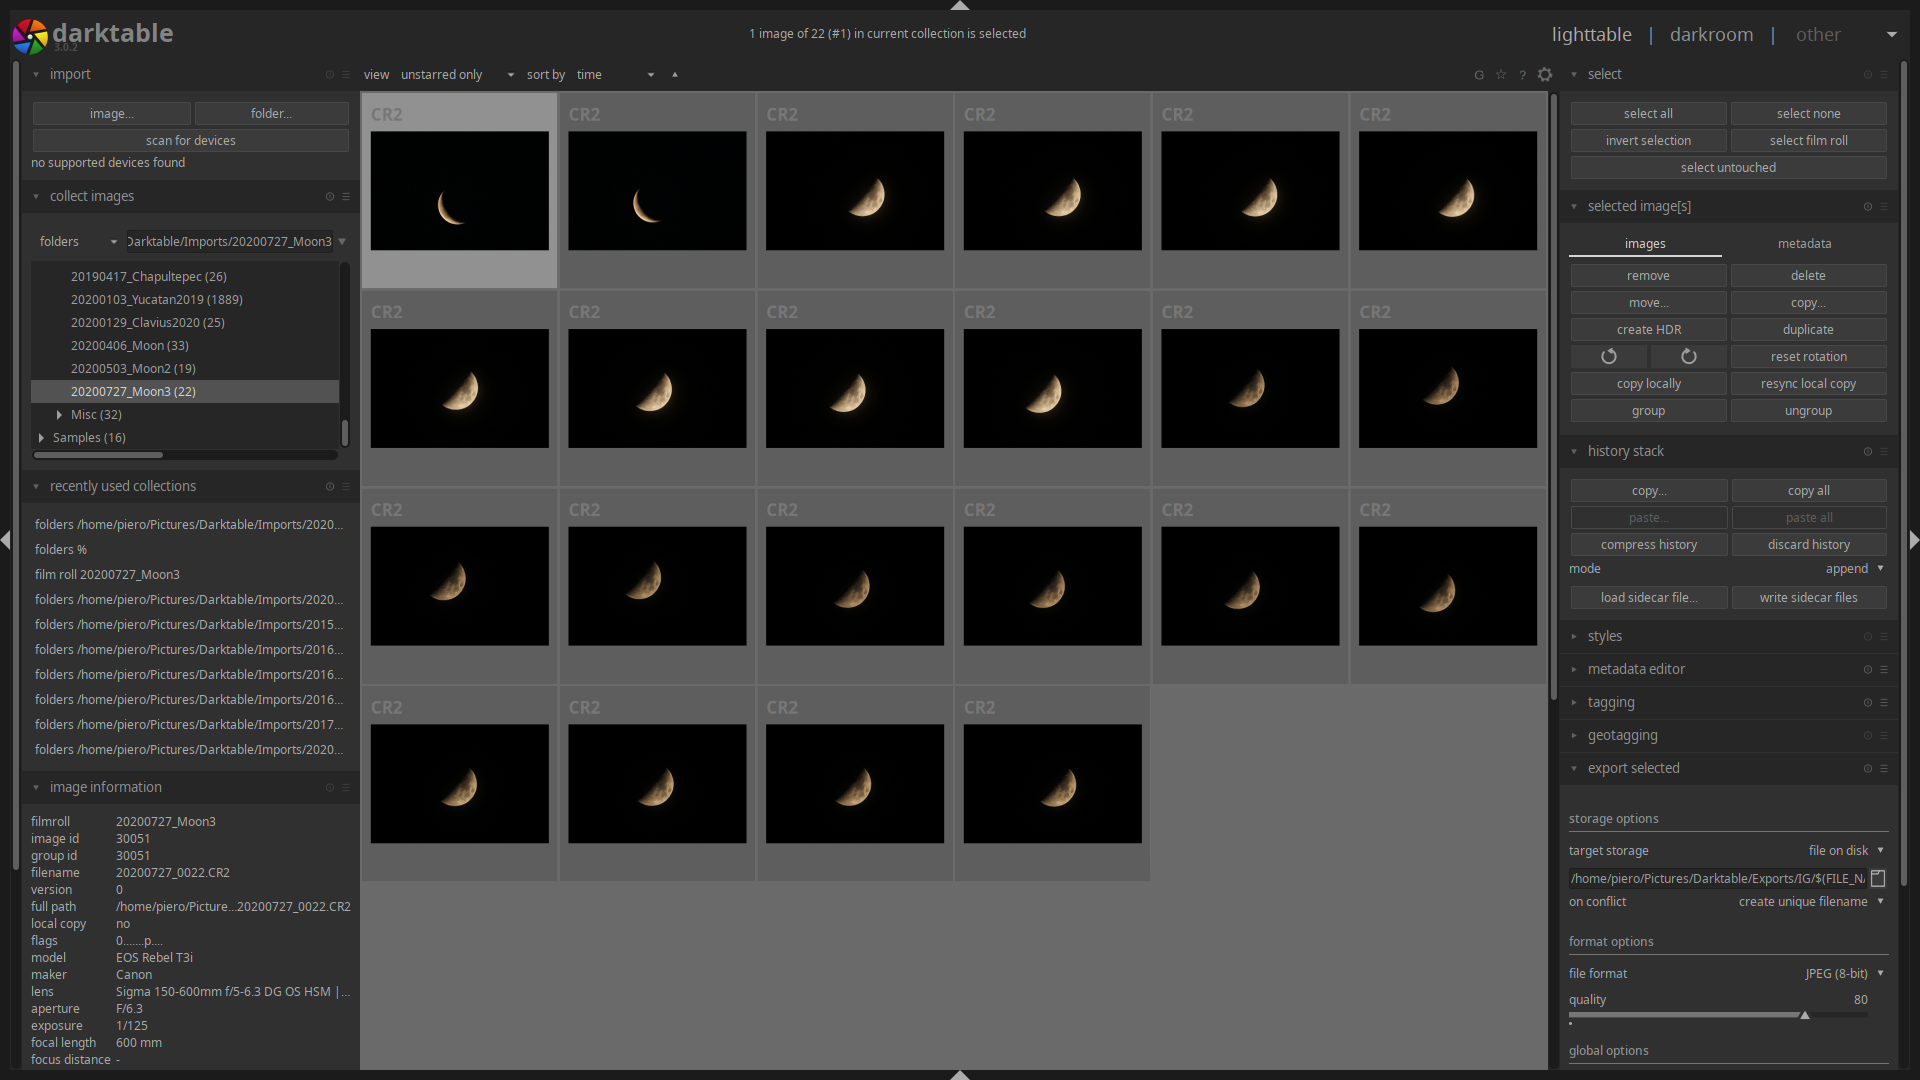
Darktable lighttable view after import
Culling and sorting images
Before editing, I usually do a few passes in order to select which images I want
to edit. Firstly, I do a very quick focus check on all my images directly from
the lighttable view. In order to do this, hover over the first image and hit
x. This opens up the “culling” mode. To check for sharpness, I usually set the
image count to just one. To free more space for the image, you can also hide any
of the side, top and bottom panels by clicking on the arrows at the edges. In
this mode, you can quickly switch images using the arrow keys or the scroll
wheel. If you want to get a closer look at an image, hover over it and hold
w. You can also zoom into an image using Ctrl+Scroll Wheel. As I scroll
through the images, I hit r to reject any out of focus or blurry images, which
marks them as discarded and allows me to filter them out later.
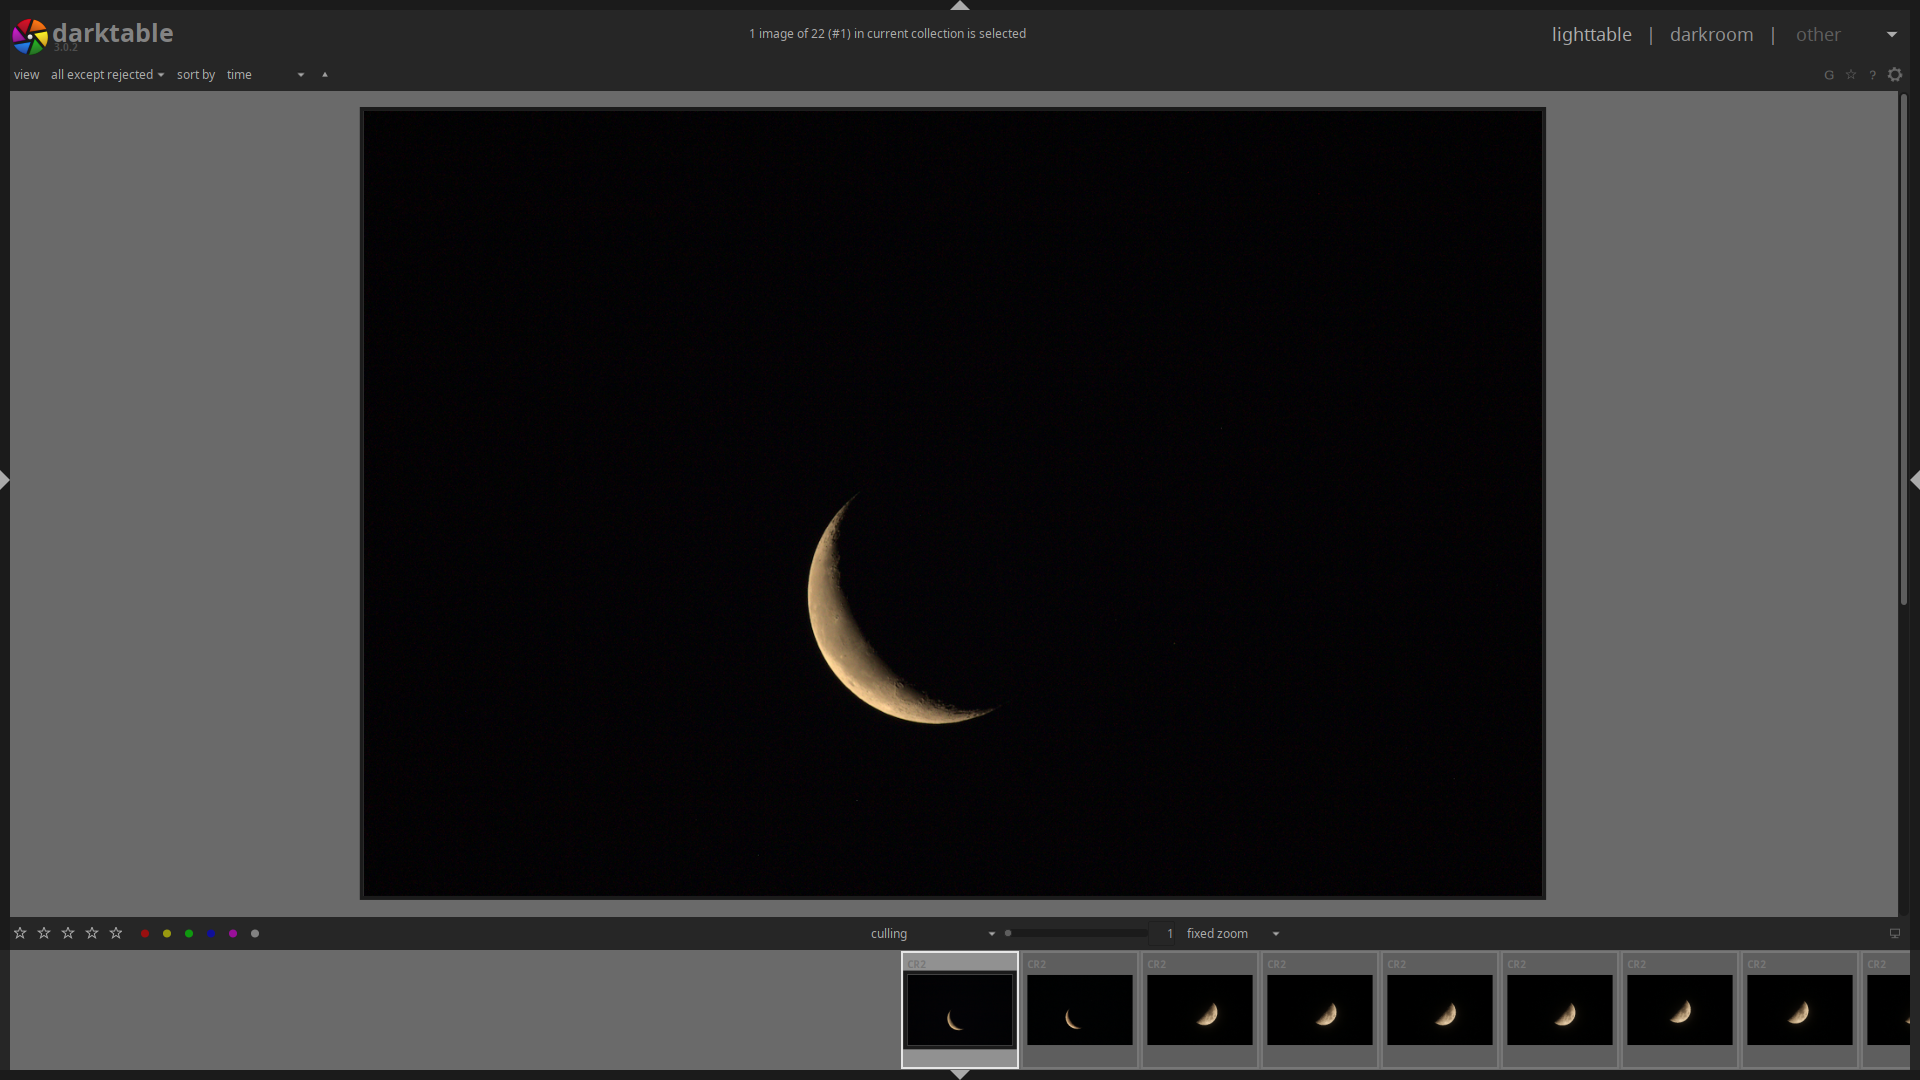
Culling mode
Once I’m done with this, on the top panel you have the option to show “all except rejected” images. With this, I look at them more carefully, marking any pictures that might be good with a 2-star rating. You can star images by hitting the corresponding number on your keyboard. With this selection, I go back and filter down to all images 2 stars or above. Now, I 3-star any images I want to edit, filter down to 3 stars or above and get to work.
Now, before jumping into editing, I have a one-time configuration I did when I started using Darktable. This will change the default behavior of a couple modules in order to make editing much simpler. To do this, double click on any image. This will bring you to the darkroom view. On the right hand panel, click on the “basic group” tab (the empty circle), go to the “base curve” module, expand it and double click the grid. The curve should turn into a line. Click on the three horizontal lines icon in the module and go to the bottom and click on “store new preset…”. Give it whichever name you want and check the box “auto apply this preset to matching images”. The default options cover every possible picture the module works for, which is what we want, so just hit save now.
We will do the same for the “highlights and shadows” module in that tab. Set both shadows and highlights to zero using the scroll wheel and create the preset so it auto-applies to all images. This allows us to edit a neutral image without having to worry about extreme initial changes (shadows and highlights) and disabling the compression that the base curve applies to the image. The base curve is handy to quickly preview how an edited image may look, but it’s a hindrance during editing.
Editing
Basics
Double click on whichever image you want to edit. This will bring you to the darkroom view we just saw. First off, for high ISO images I usually change the demosaic method to AMaZe and I add three times color smoothing. This gets rid of most hot pixels and helps somewhat with noise without losing overall sharpness like with denoising methods.
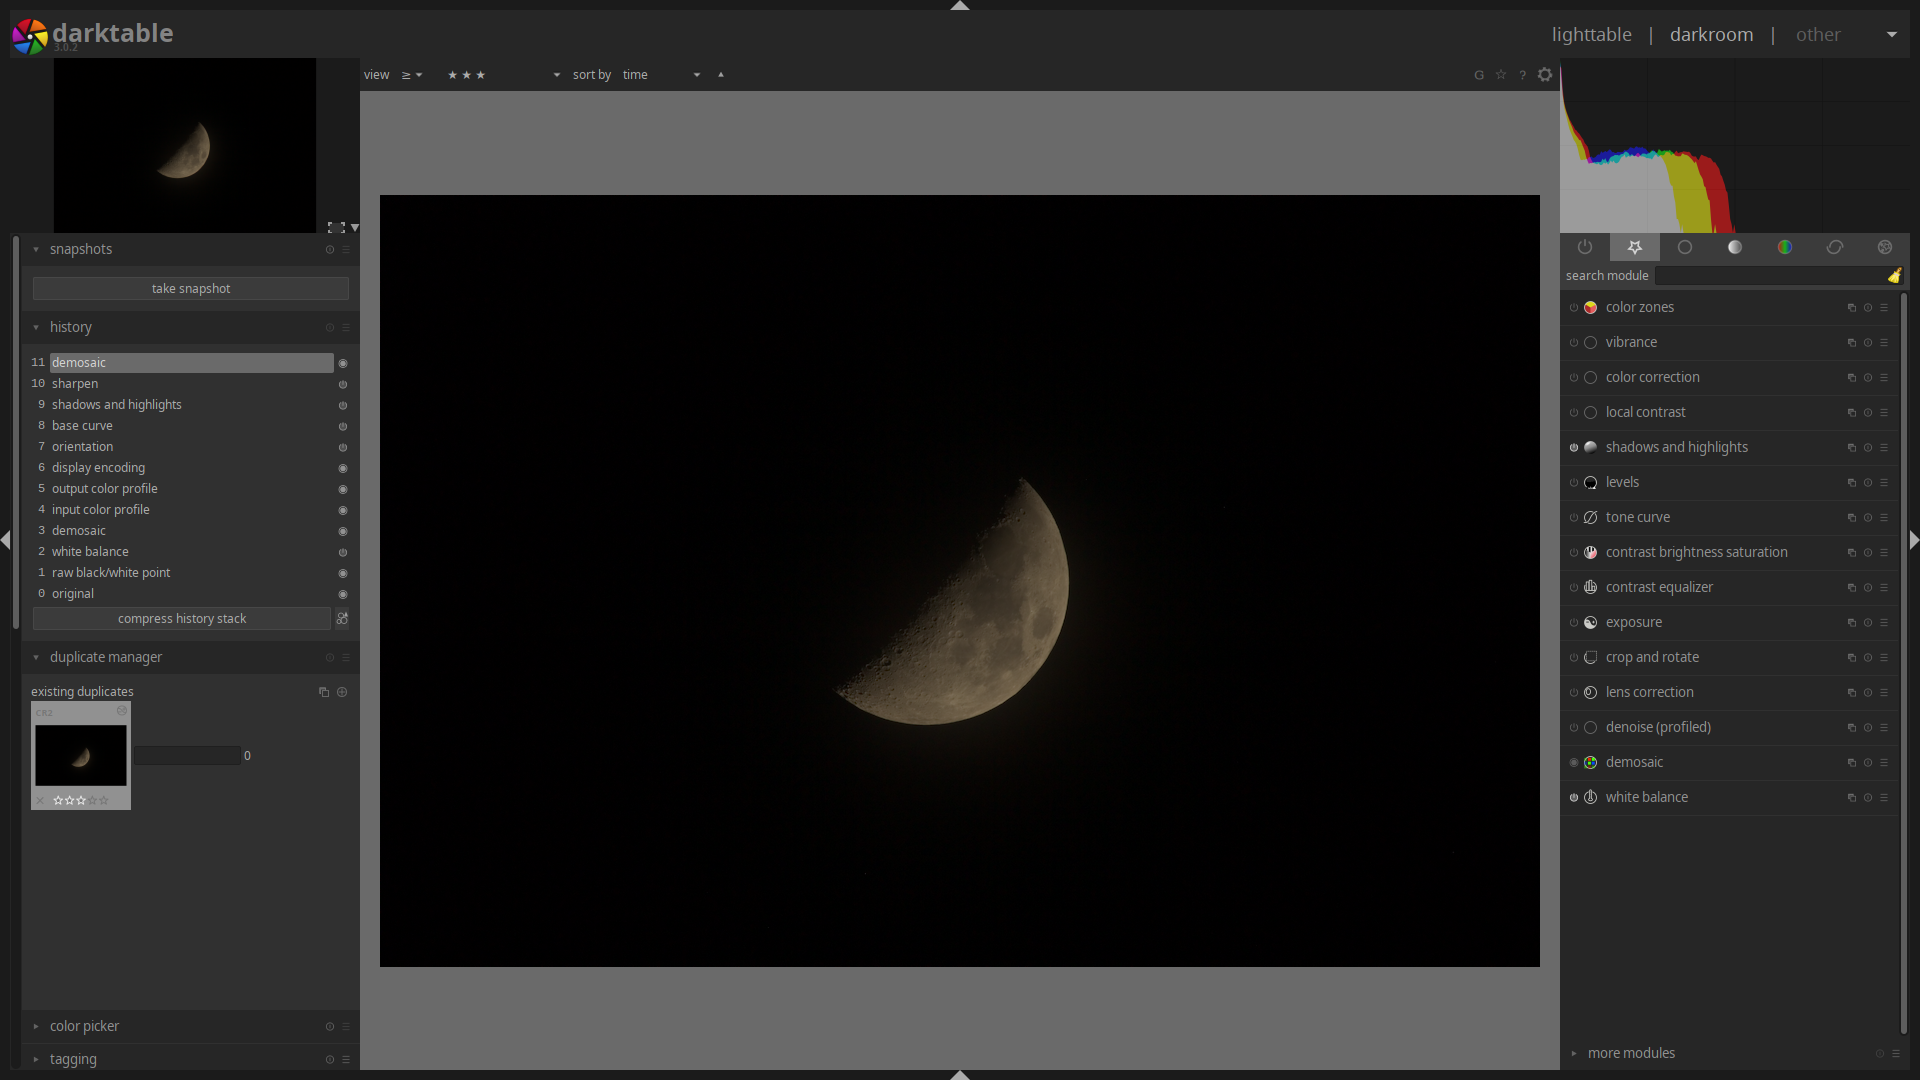
First look at the image
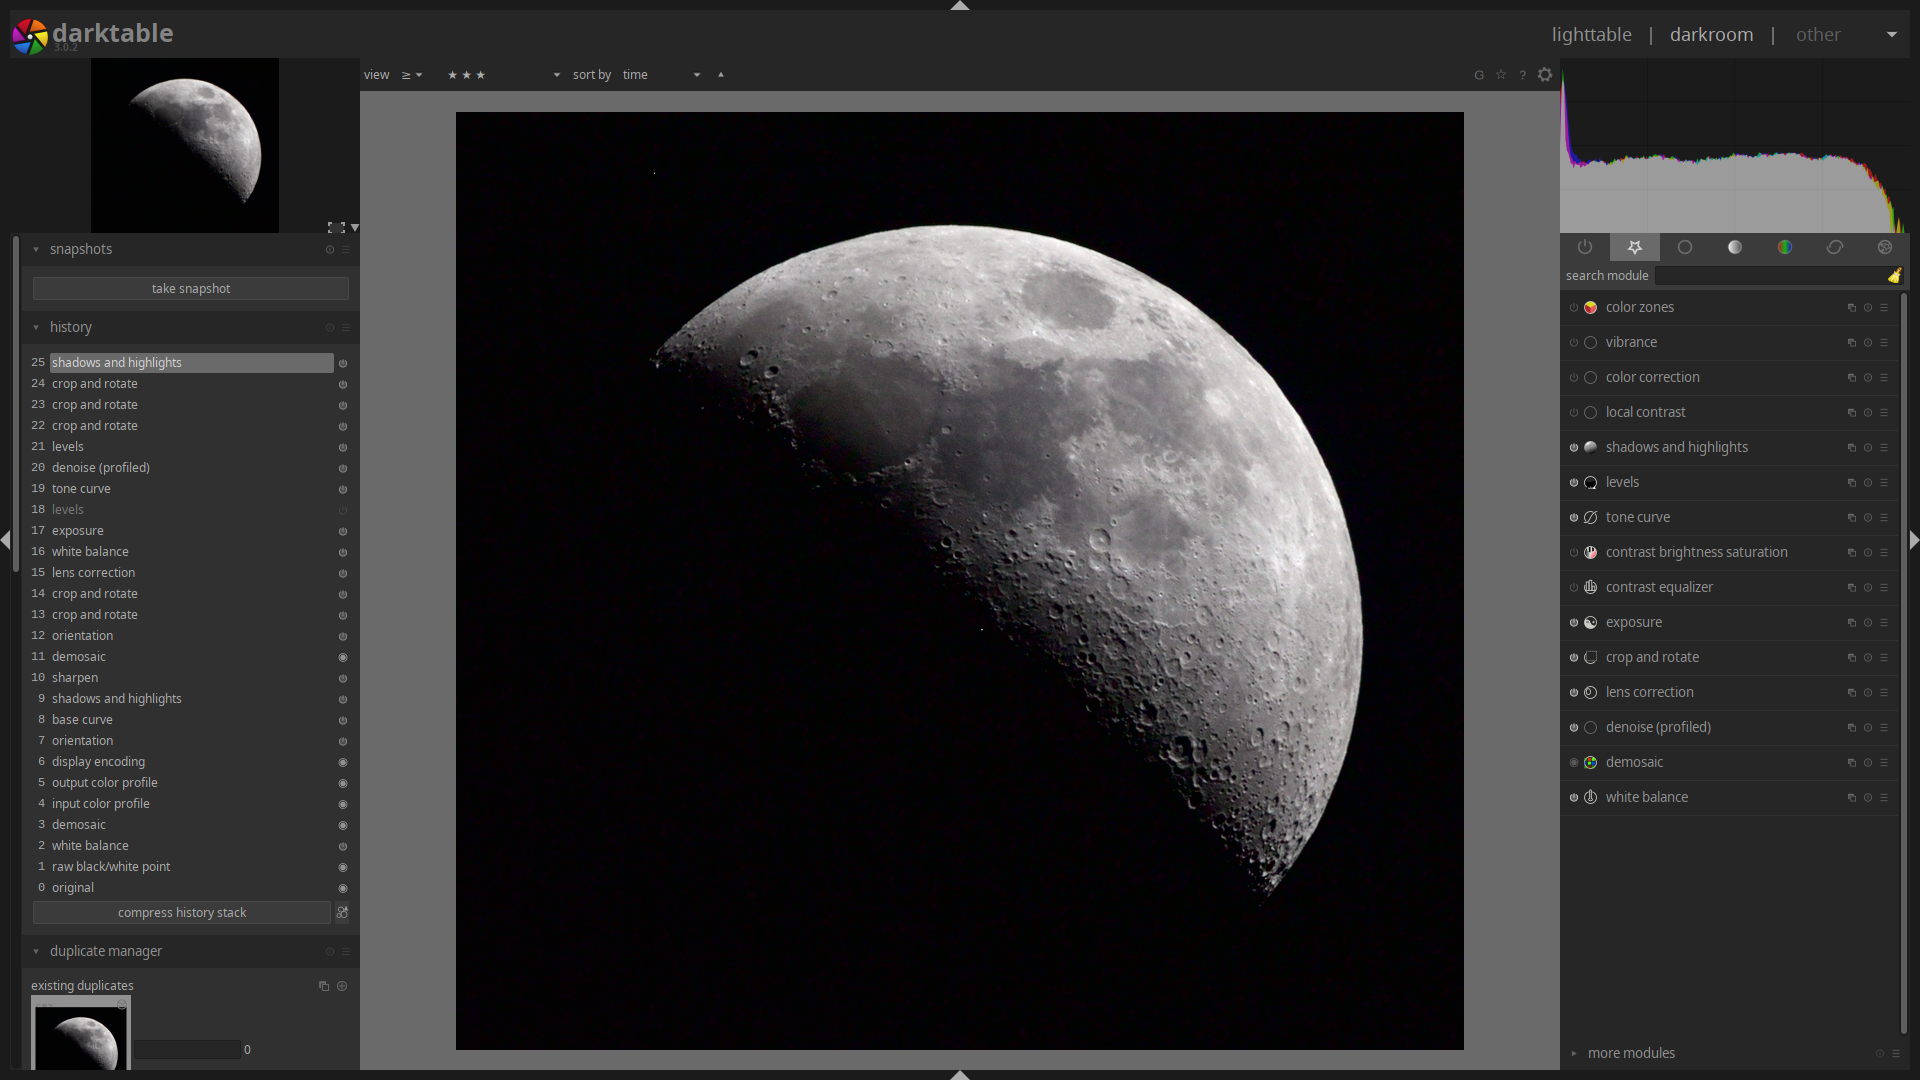
Then, I apply lens corrections (when available) by simply turning on the module “lens correction”. If you can’t find any module I name, you can simply type its name in the search bar to get it. I favorite the modules I use for easy access, I recommend you do the same. Then, I crop and rotate when necessary and adjust the white balance. After this, I adjust the exposure with the module of the same name, boosting blacks as far as I can without losing detail. You can do both these things by dragging on the histogram on the top right corner as well.

Editing the image
Next, I usually only apply denoising in the chroma channels. I don’t mind grain in my pictures, but colorful noise usually makes the image look rather bad. To do this, I use the default profile matched to the camera and ISO, then I select the “wavelets” method and apply a blending mask (checkered circle at the bottom) set to “hue” blend mode. This removes colorized noise without softening the image.
Then, I use the tone curve to adjust contrast and sometimes color saturation. I use the Lab independent channels mode instead of the RGB default, since the default messes with colors. I adjust the lightness channel, usually just with a simple S-curve, but for more complicated images, I might tweak the curve further. The ‘a’ and ‘b’ channels are usually left alone, but if there’s some color adjustment I’d like to make, I then lightly adjust these curves. I modify the final exposure using the “levels” module. Regarding the “shadows and highlights” module, I play with it when the image calls for it. I mostly just do some light shadow lifting or highlight lowering/lifting.
Editing the image
Finally, I adjust contrast further by playing around with local contrast. It can also be used to soften images, which I do depending on the subject. This can also help bring back detail when an image is slightly hazy. Do notice it will enhance noise as well. As far as color goes, I will usually just boost up saturation slightly or use the vibrance module in cases where there are already very saturated colors and increasing saturation would result in poor looking photos. This is especially the case when there are people in the shot, as increasing saturation can end up making skin tones look unnatural. For particular images, the color zones module is also useful as it allows me to highlight certain colors while subduing others.
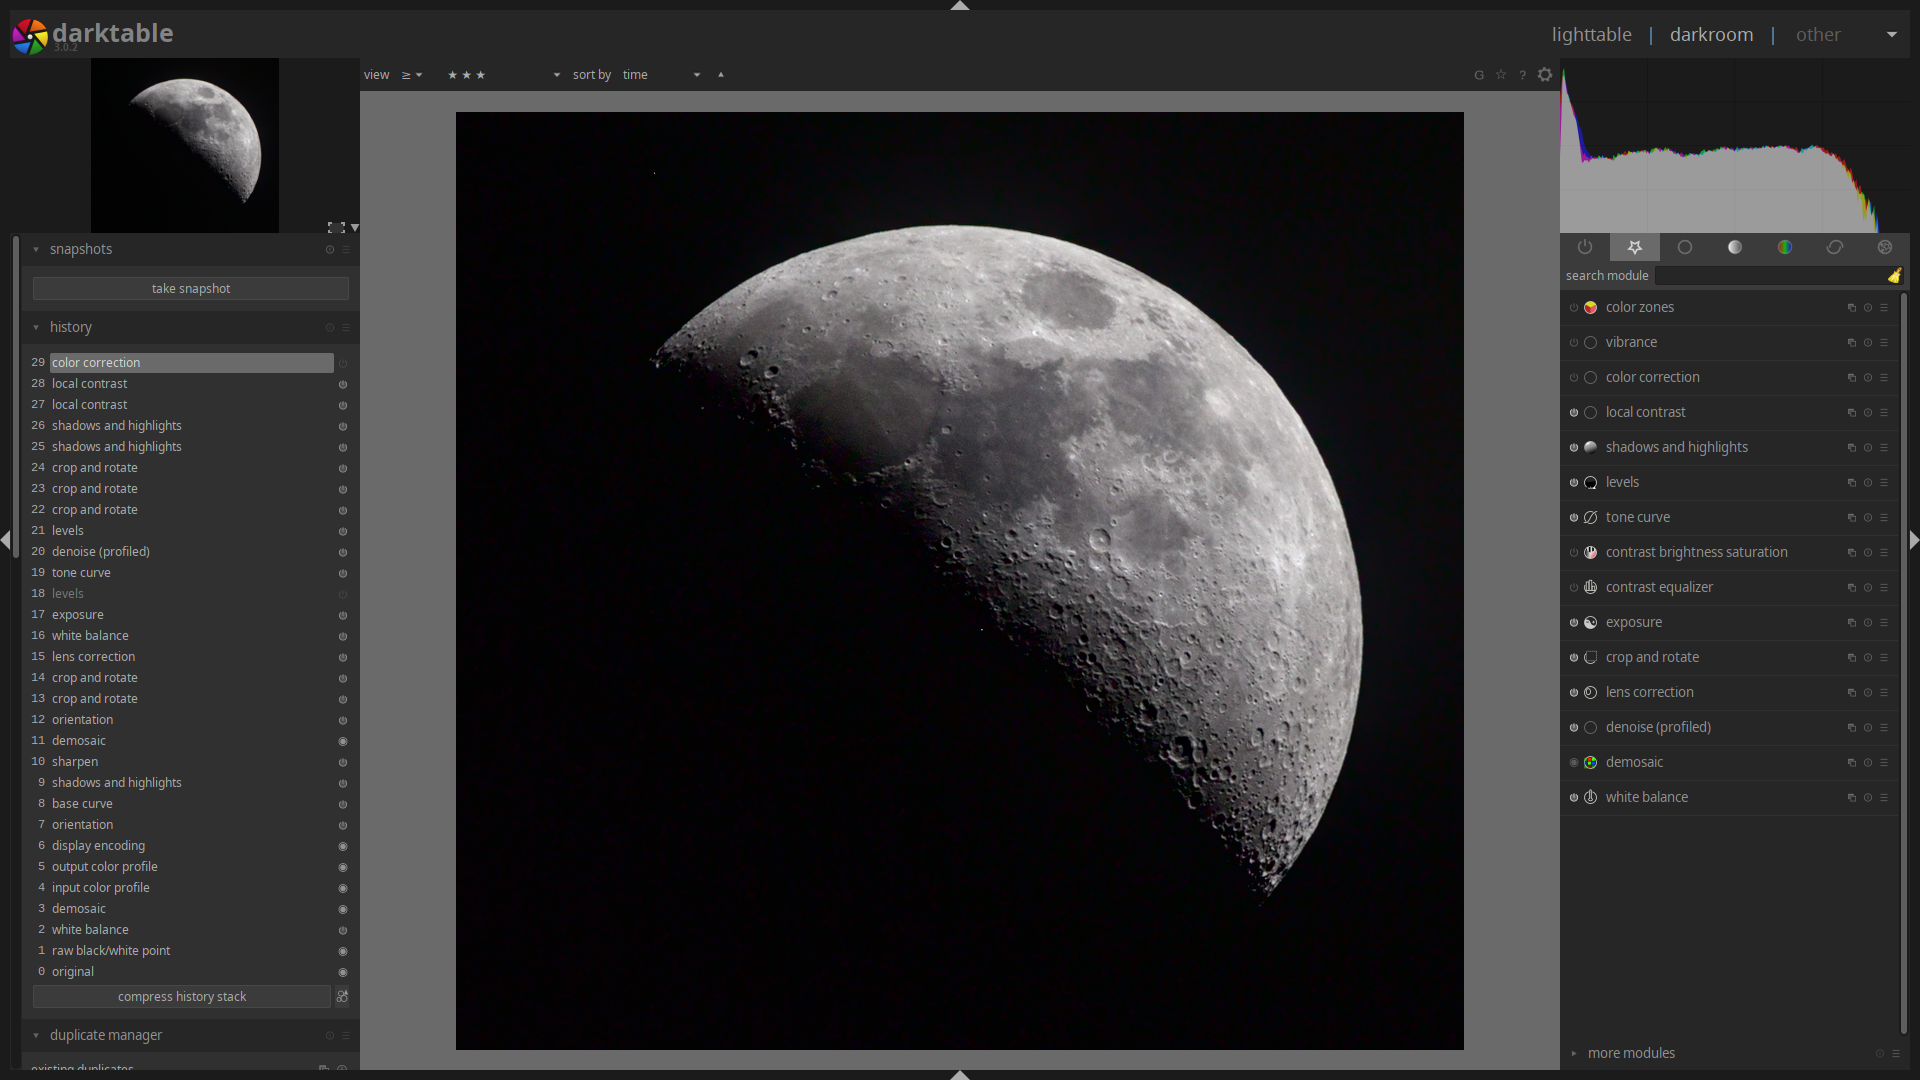
Edited image
Further editing
For certain images, I use the color correction module to add false color to an image. This allows you to tint the shadows and highlights in a particular image. You have to play around with it, not all images will look good when using it and different combinations will give you significantly different results. The contrast equalizer module allows me to fine tune contrast in certain parts of the image. Sometimes I might want fine detail to hold higher contrast, but to reduce contrast on coarser features. The module allows me to work with luma, chroma and edges, giving me very fine control over contrast.
For black and white images, more often than not, setting saturation to zero will work. However, the “monochrome” module allows me to have much more control over how the image is converted to black and white. Playing around with it a bit allows me to set the highlight and shadow balance regarding the original color data. The “color zones” module can also be used to adjust this after conversion. The “split toning” module allows me to tint a monochrome image to, say, achieve a sepia look. A few presets are available in the module. If the image was converted by desaturating it, it can also be tinted using the “color correction” module. It’s possible to use this module with the “monochrome” module by altering the pixel pipeline order, however I don’t recommend doing this unless you understand what you’re doing.
I don’t normally mess with the initial sharpening defaults, however if you want to alter those, you can under the “correction group” tab. There, you can also use the “defringe” module when your lens isn’t available under “lens corrections”, as well as the “haze removal” module, which does a somewhat better job than local contrast to reduce haziness. A second instance of the “denoise” module can be created by clicking on the overlapped squares in order to reduce luma noise. For this, I use non-local means and I either reduce the strength, the blend mask opacity, or a combination of both. The blending mode I use is “lightness”. There’s a lot more modules, read up on them in the official documentation and play around with them.
When I’m done editing an image, I usually go to the bottom of the history module on the left hand side panel, in the darkroom view, and I hit “compress history stack”. This simplifies the history stack and removes unnecessary items that don’t affect the final image.
Bulk editing and multiple edits
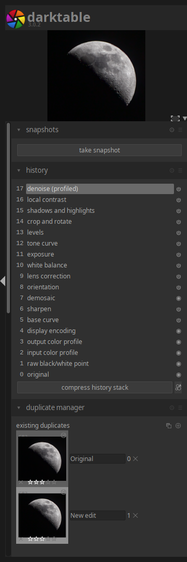
Duplicates, history stack and snapshot modules
When editing a lot of very similar images, you can edit one image and transfer the resulting history stack, that is, the edits you made, to the rest of the image set. To do this, you go to the lighttable view, select the image you edited and in the “history stack” module on the right hand side panel, click on “copy…” and select which edits you’d like to carry over. Then, select the rest of the images and click on “paste all”. They will immediately have the edits applied.
In order to store the edits you made to an image so you can later apply them to images from various sets, you can create a style. To do this, in the darkroom view, go to the bottom of the “history” module and click on the icon in the bottom right corner. Here, you can add a name, description and select which edits you want your style to have. To apply the style, you only need to go to the lighttable view and in the “styles” module, double click on the style you want to apply.
Finally, if you want to re-edit an image without discarding your previous edit, you can create a duplicate by going to the “duplicate manager” module on the left hand side panel in the darkroom view and create one. You can copy the history stack of your previous edit or start anew. To compare edits, you can use the “snapshots” module at the top of said panel, which will allow you to drag a slider that will uncover one edit on one side and the other opposite to it. Duplicates do not copy over the image, but solely the history stack and other metadata, meaning that the storage cost is negligible.
Exporting
Exporting images in Darktable is rather simple. A few basic metadata fields can be edited with the “metadata editor” module on the right hand side panel. Preferrably, you’d want to do this in bulk during import or even in-camera. However, if you’d like to edit something in particular for an image, you can do so there.
Prior to exporting, depending on the use for the image, I’ll apply a plain, semiopaque text watermark. I created the watermark using the aptly named “watermark” module and then saved it as a style, as shown previously. Then, I apply the style to the image and adjust if necessary in the darkroom view.
Finally, in the lighttable view, at the bottom of the right hand side panel is the export module. Here, you can specify the format, quality, size, destination folder, among other things for the exported image. I recommend looking into what the image will be used for and export accordingly. For example, I have a preset for Instagram that compresses the image to JPG and restricts the length to 1080 pixels as per Instagram’s recommendations. From here, just select the images you want to export, hit “export” et voilà.

Update 2020-12-10
Instagram has deprecated their free API endpoint, which means I’d have to add tracking to the page in order to embed the image, and I won’t be doing that. So I’ve replaced the Instagram embed with the Flickr one and added the Instagram link below.